One of my recent overshot style weaving projects started with this tribal shield inspiration picture I found on Pinterest.

Because I was so drawn to the beautiful earthy nature of this shield, I knew I just had to weave a table runner using similar colors. I wondered if I could mimic the same feelings of texture in the personality of the shield. That became my artistic challenge, to bring the look and feeling of this piece to a handwoven table runner.
As I began to plan the structure of the piece I knew that using an overshot technique for my weaving would probably give me the visual texture that I desired.
The overshot technique in weaving is accomplished by using two different thickness of thread alternated in the weaving rows. The pattern row is made using the thicker of the two threads and usually skips over several threads to achieve the desired pattern that you are weaving. The thinner of the two threads is woven across the warp before and after each thicker pattern thread to “lock in” the pattern thread. The thinner threads are woven in tabby (weaving speak for plain weave).
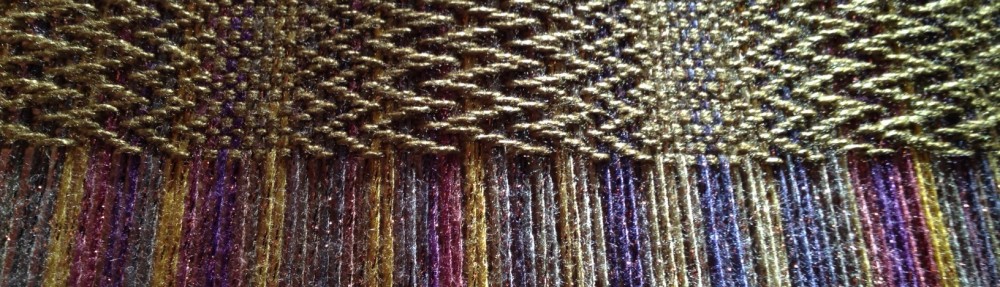
I feel that using the overshot weaving technique helped me to capture the textual feeling I wanted for this runner. Here is how the project progressed and a list of the yarns that were used.


For the warp threads (threads going from the front to the back of the loom) and the tabby threads I used a dark brown cottolin yarn. Cottolin yarn is made from 60% cotton and 40% linen. The pattern thread used was an 8/4 cotton yarn. The 8/4 refers to the size of the yarn. The cotton yarn was about twice as thick as the cottolin yarn, thus the raised overall textural look and feel in the runner.

With the color pallet and types of yarn I chose and using the overshot technique, I felt like I was able to achieve the look that I wanted for this project. What do you think??
Half way through my weaving I decided I wanted to add a little something special to the piece that would bring the cultural influence in the tribal shield that inspired me to create this project to begin with. As I searched for that special something, I found a vendor on Etsy that imported fair trade beads from Africa. Handmade metal and hand-carved bone beads. I was pretty excited! Special handmade beads from another artist to compliment a handmade runner, just what the runner needed for that finishing touch. When the beads arrived I laid them out on the runner that I was almost finished weaving and knew it was definitely the perfect accent!

Once I was finished weaving I began the long and difficult task of adding the beads to the fringe of the runner.
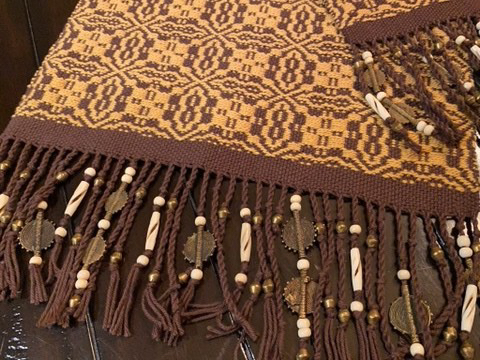
Adding the beads to the finished runner was a long and tedious task but definitely worth the work, time and effort when I saw the finished project!! Once the beading was finished all that was left was to do the finishing wash and block drying and trimming off any overlapped threads in the weaving.
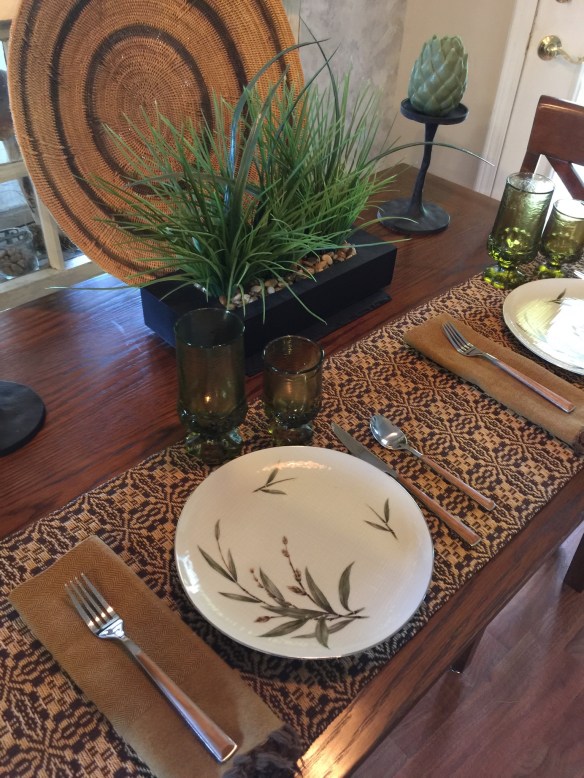
I love how the runner turned out! I feel it definitely has the look and feel of the inspiration photo. This runner would look beautiful with many types of dishes or pottery. Here is an example…..
Another picture of the finished runner….

After I finished this runner I decided to make this same style in a couple more colors. In a future post I will show some pictures of those finished runners too.
I actually had some beautiful brass and bone beads leftover from my weaving projects so I made those into some fun jewelry pieces . I’ll have some pictures of those in my next blog post.
So that’s about it for this post. Hope this article inspires you to make something beautiful! Until next time….

…I wish you Peace.


