SHIMMERING SCARF FINISHED!

Image

Do you remember that beautiful shimmering warp I posted about last week?  Well, it just turned into an even more beautiful shimmering scarf !!  This is the finished scarf.

 I thought you might like to see some pictures of the scarf being woven so here are a few.

Image

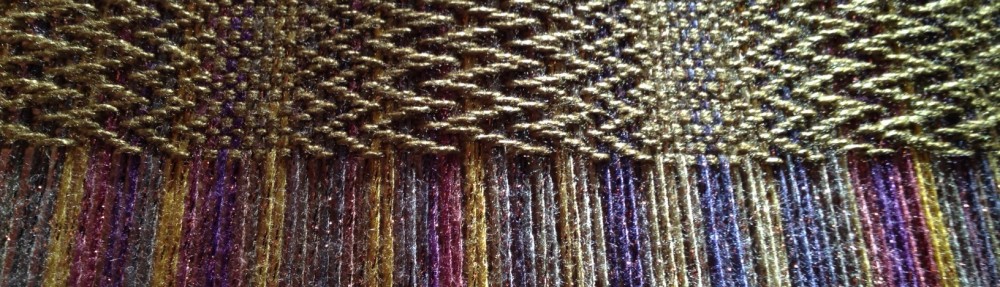
After I added the warp to the loom then the weaving process began….

IMG_0517

…and the twill pattern began to show through the woven threads.

IMG_0501

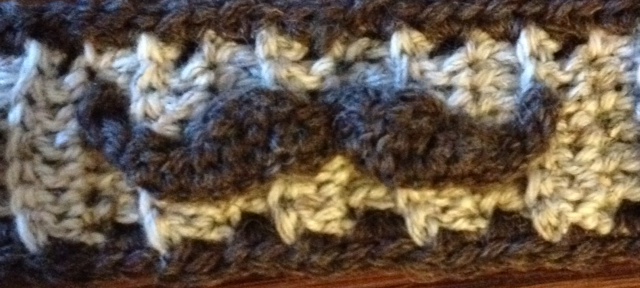
This picture shows the texture of the twill weaving.

Image

I love how this zig zagging textured twill pattern looks intermixed with the bands of plain weave.Image

Time to cut the woven scarf off the loom and start the finishing process.

Image

I wove the scarf about 98 inches long but as expected it did shrink a little in the finishing wash.  But before I washed it I tied the fringe at each end of the scarf.

Image

This is how the scarf looked after it was washed, air dried, then fluffed in the dryer.

It has a very fluid and silky drape.

Image

I love how my shimmering scarf turned out!

Here is a sneak peek at my next project going on the loom.  I will be using these beautiful hand dyed skeins of rayon yarn to make another twill patterned scarf.

IMG_0549

 I purchased this beautiful yarn on Etsy from the vendor  –  robinjedmundson.etsy.com

 IMG_0594

Guess it’s time to get back to the loom and warp up another project !

 Until next time….

DSC01768

                   …..I wish you Peace

Knit One, Crochet Too!!

Image

With all the cold and snow we have been getting this winter I have been crocheting some gifts for this Valentine’s Day.  I really had not crocheted in several years, but with a quick review of the stitches, it all seemed to come back to me pretty quickly.

 The following pics are some of the projects I just finished.

photo 1-2

 These are some of the fingerless gloves that I made recently.

photo 2-2

 I got the pattern from the bobwilson123 you tube page, under the title fingerless gloves tutorial.

photo 3

I did change them a little bit by adding a double crochet border to the bottom of the glove and a scalloped border at the top of the glove.

photo 5

This is a great pattern because the gloves are reversible.

photo 4

As you can see in the above pic I have turned one of the gloves “wrong side out”.   I love the look either way, and have already worn them both ways.  As green is my fav color I couldn’t resist keeping the green pair for myself.

 I also made several “Bob Marley” style slouch hats from a pattern I got on Etsy from the vendor Pixiebell.  It was a very easy to follow pattern and I have already made about 4 hats.  She uses the thick and quick yarn for the pattern, but because I wanted to make a set of gloves with matching hat for some of my gifts I just used the yarn that I made the gloves out of, but used double threads on the hook.

crochet slouch hat

The picture above is from the Pixiebell Etsy page.

Another quick to make crochet project I made for some Valentine gifts were these

photo 1

cute little mug cozy wraps, or as I call them, Mug Belly Warmers!  I got the pattern for these and for the embellishments, the mustache and the flower,  from the bobwilson123 website also.  Here’s a close up pic…..

photo 2

of the mustache embellishment,

and this is what it looked like on the mug.

photo

These were really quick to make and soooo easy!!

Well I hope we will not have too many more of these days….

IMG_0053

but if we do…..

there’s always a quick crochet project just waiting  around the corner to warm our hands and the hearts of those we gift them to!

DSC01768                                    Until next time, I wish you Peace…..

BRINGING A NEW ‘BABY’ HOME SATURDAY!!

Image

Just ordered my new loom and will be picking it up on Saturday!!  I purchased the 36″ Mighty Wolf  by Schacht,  an 8 harness, 10 treadle Floor Loom.   As I researched this loom I was quite impressed by the features.  The treadles are not a direct tie up style.

mw-labelled-parts

There are slots in the wood of each treadle so that you just slide the tie up cords into the desired treadle slot to “tie it up” to that particular shaft (harness).  So easy!  Another feature I though would be great is that each of the heddle shafts can be completely lifted out of the loom to add in or take out extra heddles.  It can be laid on the table to work on, so no more finagling with the bars while the shafts are on the loom and consequently dropping heddles on the floor or  worse, realizing you have missed threading one of the heddle bottoms after you have finished putting them on.  Of course, that always ends up being the  50th heddle out of the hundred that you have put on, way back in the middle of the shaft!  Hate to admit it but, yes, that has happened to me a couple of times with the Wolf Pup loom.

IMG_0311

I already own the Wolf Pup, 4 harness, 4 treadle, 18″ loom by Schacht (pictured above).    It has been a great little workhorse, but I am looking forward to the ability to do more complicated patterns with the 8 harness model and the much wider 36″ loom.  Like the Wolf Pup the new loom has the ability to be folded up for storage with or without a warp on the loom.  For anyone that has limited space for their equipment this is a great feature.

New pics to follow soon…..

DSC01768

                                                         until then I wish you Peace……….