Love this video by Jonna Jinton, an artist and vloger from Sweden. So inspirational to listen to when I’m creating art in the studio.
Hope you enjoy!
Love this video by Jonna Jinton, an artist and vloger from Sweden. So inspirational to listen to when I’m creating art in the studio.
Hope you enjoy!

In my last post I mentioned that I had made a few jewelry pieces from the extra fair trade brass and bone beads leftover from my handwoven runner projects. I thought my readers might like to see some of those pictures so here they are…

I made these earrings and then made this earthy necklace to go with them.

The round elephant disc is made from FIMO clay that I impressed using one of my rubber stamps. Recently I added a light layer of off-white paint to just the elephant part of the clay and then burnished it with a light layer of antique bronze coloring. I’ll try to post a picture of those changes when I get a chance to take a few more pic.


Pictured above are several additional sets of earrings that I made. Two of the pairs of earrings have lava beads in them. I added the lava beads because they are porous and I can add a drop of essential oil to them. It’s like having a little therapeutic uplifting scent added to the back of your ear.

I made this necklace to match the above earrings. Once again I used FIMO clay for the bottom focus part of the necklace. This time I added a little bit of bronze color to the stamped design in the clay. This is one of my favorite jewelry sets to wear, and since the colors are neutral these pieces go with lots of different outfits.

This is just a quick post to show you some of my handmade jewelry. My next post will include pictures of the other runners I made and embellished with the fair trade brass and bone beads.
Hope everyone has a great weekend! Until next time….

….I wish you Peace
One of my recent overshot style weaving projects started with this tribal shield inspiration picture I found on Pinterest.

Because I was so drawn to the beautiful earthy nature of this shield, I knew I just had to weave a table runner using similar colors. I wondered if I could mimic the same feelings of texture in the personality of the shield. That became my artistic challenge, to bring the look and feeling of this piece to a handwoven table runner.
As I began to plan the structure of the piece I knew that using an overshot technique for my weaving would probably give me the visual texture that I desired.
The overshot technique in weaving is accomplished by using two different thickness of thread alternated in the weaving rows. The pattern row is made using the thicker of the two threads and usually skips over several threads to achieve the desired pattern that you are weaving. The thinner of the two threads is woven across the warp before and after each thicker pattern thread to “lock in” the pattern thread. The thinner threads are woven in tabby (weaving speak for plain weave).
I feel that using the overshot weaving technique helped me to capture the textual feeling I wanted for this runner. Here is how the project progressed and a list of the yarns that were used.


For the warp threads (threads going from the front to the back of the loom) and the tabby threads I used a dark brown cottolin yarn. Cottolin yarn is made from 60% cotton and 40% linen. The pattern thread used was an 8/4 cotton yarn. The 8/4 refers to the size of the yarn. The cotton yarn was about twice as thick as the cottolin yarn, thus the raised overall textural look and feel in the runner.

With the color pallet and types of yarn I chose and using the overshot technique, I felt like I was able to achieve the look that I wanted for this project. What do you think??
Half way through my weaving I decided I wanted to add a little something special to the piece that would bring the cultural influence in the tribal shield that inspired me to create this project to begin with. As I searched for that special something, I found a vendor on Etsy that imported fair trade beads from Africa. Handmade metal and hand-carved bone beads. I was pretty excited! Special handmade beads from another artist to compliment a handmade runner, just what the runner needed for that finishing touch. When the beads arrived I laid them out on the runner that I was almost finished weaving and knew it was definitely the perfect accent!

Once I was finished weaving I began the long and difficult task of adding the beads to the fringe of the runner.
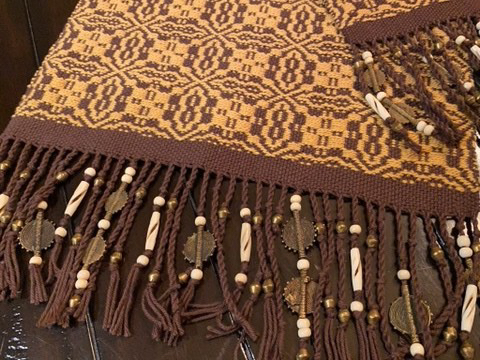
Adding the beads to the finished runner was a long and tedious task but definitely worth the work, time and effort when I saw the finished project!! Once the beading was finished all that was left was to do the finishing wash and block drying and trimming off any overlapped threads in the weaving.
I love how the runner turned out! I feel it definitely has the look and feel of the inspiration photo. This runner would look beautiful with many types of dishes or pottery. Here is an example…..
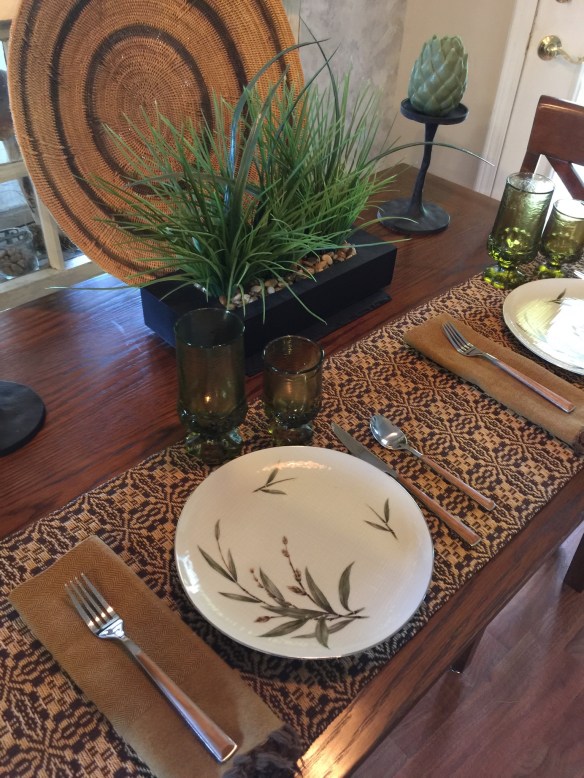
Another picture of the finished runner….

After I finished this runner I decided to make this same style in a couple more colors. In a future post I will show some pictures of those finished runners too.
I actually had some beautiful brass and bone beads leftover from my weaving projects so I made those into some fun jewelry pieces . I’ll have some pictures of those in my next blog post.
So that’s about it for this post. Hope this article inspires you to make something beautiful! Until next time….
…I wish you Peace.
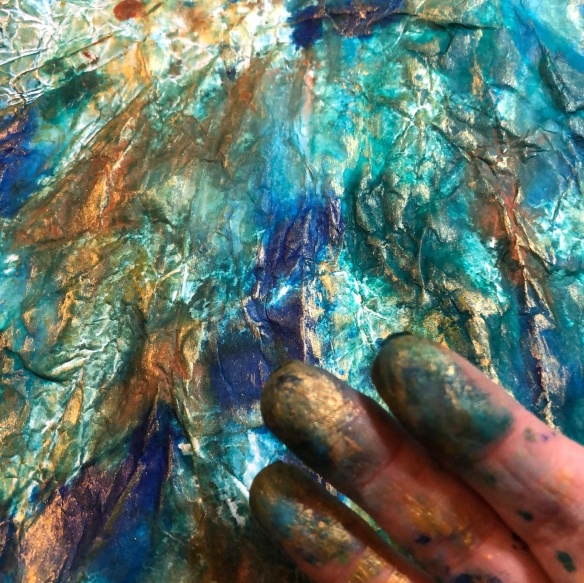
Turning plain white Tyvek paper into these colorful beads!!

My latest project has been making these beautiful paper beads. Just the kind of project my happy painting fingers were ready for! I had been watching several videos online about making these beads and decided I definitely wanted to make some, so I ordered 20 sheets of Tyvek paper from Amazon. I did see that several of the people in the videos also used Tyvek envelopes that they had saved from something they received in the mail or from a friend that had recently put insulation on their house and had some of the extra tyvek paper. I was very surprised at how strong this paper is, I couldn’t even tear it! But it did submit to the coaxing from my heatgun to make some very interesting shapes!
To begin making these beads I first crumpled the paper up, then flattened it back out for painting. I knew that would add some dimension as I painted these white sheets of Tyvek with several colors and layers of acrylic paints. I made sure to add in some glitz by painting on some metallic gold paint as you can see from these pictures.
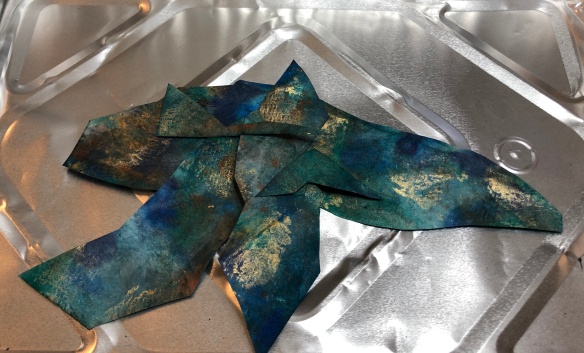
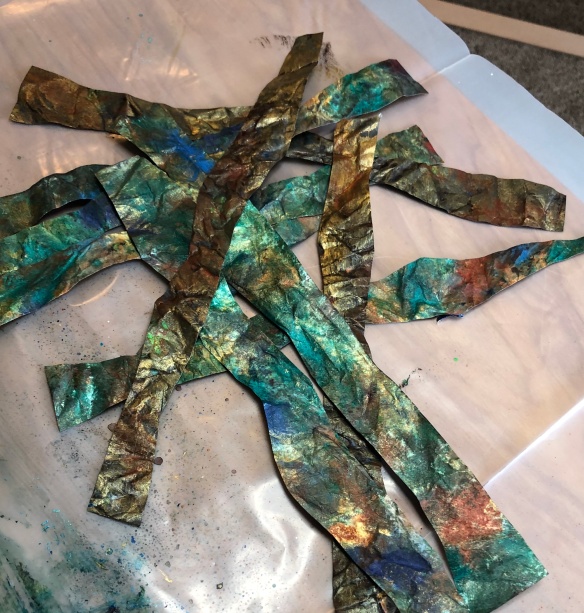
After I painted the front side I let it dry and then I also painted the backside. Once the paper was completely dry on both sides, I cut it into strips. Some of the strips I cut into long triangle shapes, some I cut into other various shapes and sizes.


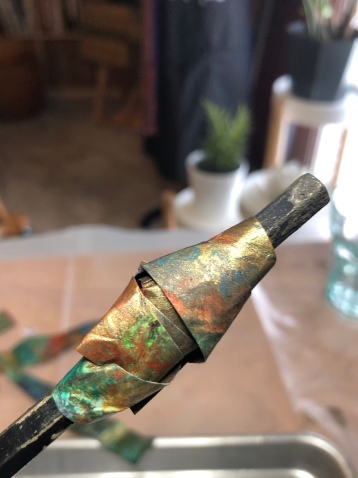
Once I knew the paper was well secured I used my heat gun to begin “melting” the paper strip to itself and help it to create textures and curls in the “bead”.


I am already picturing all the fun things I want to make using these beads! Definitely jewelry and I have a few other fun things in mind that I would like to try!
I hope you enjoyed seeing how these beads were made and will drop back in for a visit when I post the pictures of the resulting art pieces made from these beads!
Until next time……
…..I Wish You Peace

I love the freedom that modern impressionistic painting with fluid Acrylics and Alcohol Inks brings to the canvas. The abstract designs lend themselves to so many applications.
Recently, I have not only painted in this style to make artwork to hang on the wall, but have also been making other art pieces like these jewelry items…

I have been making necklaces, earrings, rings and even bracelets!

Some of these were painted using acrylic paints and some were made using alcohol inks.
I love the many feelings and styles of this jewelry so I decided to name the lines of jewelry that were made from each of the particular canvas. Here is a list of some of the names I came up with….
Slice of Nature, Mesa Verde, Gold Rush, Dragon’s Lair, Under The Sea and Autumn Splendor.
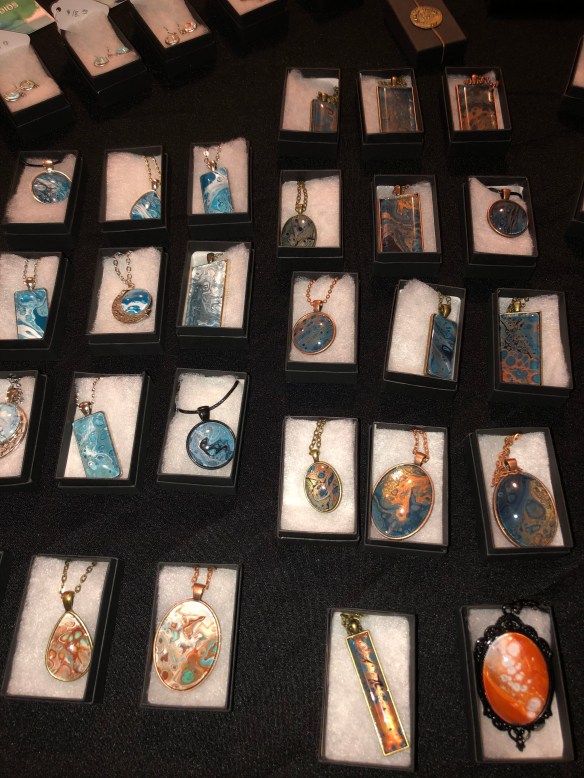
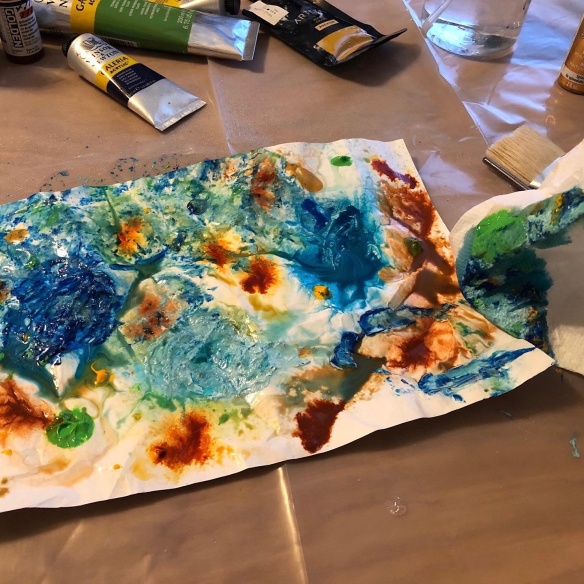
Here is an example of how the process to make these beautiful pieces begins. First I must decide the additives I will use with my acrylic paints to get the desired effect in my painting. This took me quite a while to work out my favorite 2 or 3 formulas.
Once I decide on the formula, I then decide whether the application of the paint will be on Canvas or Yupo paper.


The above picture shows some of the pieces I made using Alcohol Inks, these are part of my Autumn Splendor Line.
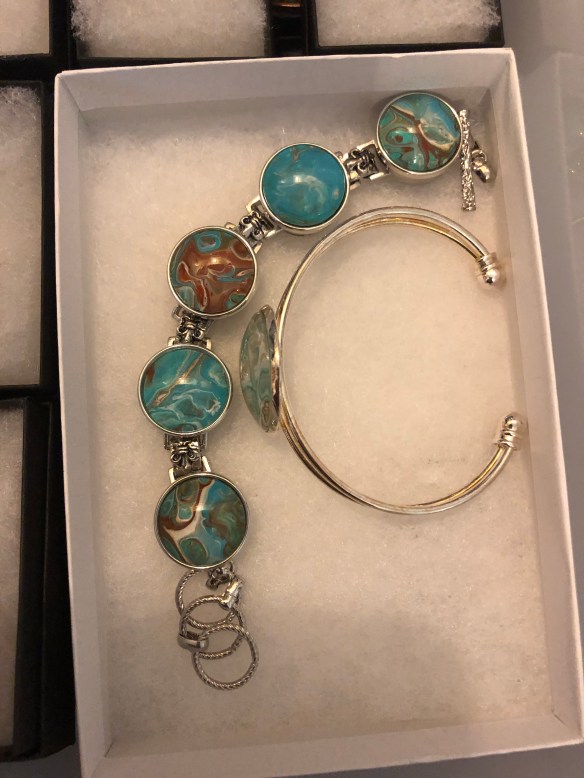
The above bracelet with several round pieces is from my snap jewelry. I have made additional pieces in a variety of colors, so the artwork on these is interchangeable. Meaning a person can take these 5 round pieces off and put different colored snaps in their place. Being able to change out the round pieces makes this jewelry very versatile, I love that aspect of this style.


*******
Another project I just finished were my new business cards……

I am so please with how they turned out!! What do you think??
******
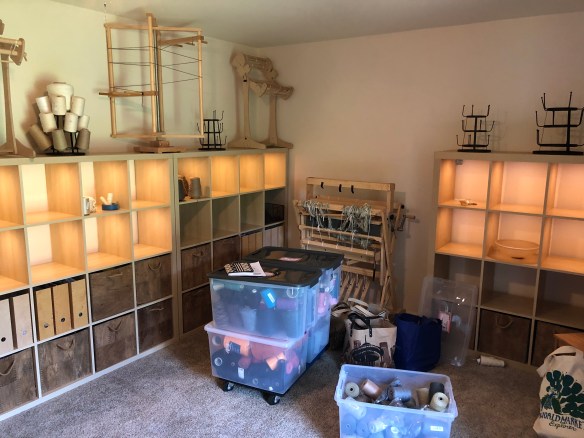
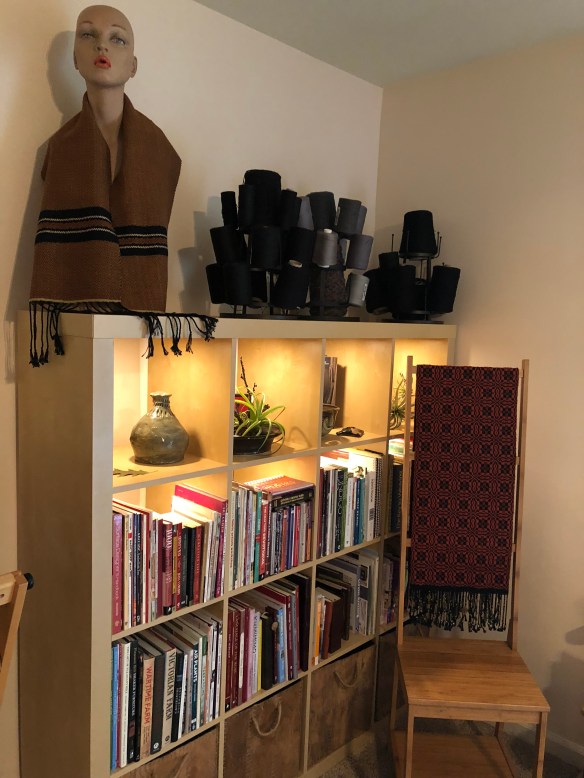
Well it’s time to get back to work on my new studio spaces, so I will end this post. I look forward to our next coffee break and bringing you up to date on the latest adventures here at the Art Pod.
Until next time……


I am so fortunate to have had many friends in my life that definitely know the words to the song in my heart. And something that makes me very sad is when one of them is going through something difficult in their lives. You know that you can’t “fix” it for them but all the same you somehow want to help build them up and encourage them that they will get through this hardship.
Today I wanted to share a weaving project that was meant to do just that. A friend of mine was going through something tough and was feeling pretty discouraged and I began to try to think of something that might cheer her up.
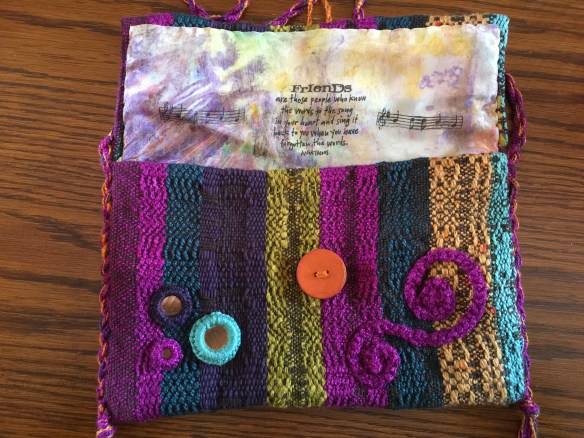
I decided I wanted to try to weave something colorful and cheerful for my friend. I was just finishing up a project on one of my floor looms that had some leftover dark brown cottolin warp threads, so I decided to try an experiment. This purse was the result of that experiment.

I knew my friend loved very colorful things so I knew that the purse would need to have lots of color. I went through a bunch of leftover yarns that I had from other projects and made a pile of them by my loom and then began weaving random patterns. This is how it looked on the loom during the weaving process.

There was no rhyme or reason to how I laid the colors or patterns out, this was just random treadling and colorful playing in my threads.

I really did not even try to repeat or keep track of any of the patterns I was weaving.

Once I felt like I had a big enough piece woven to make a small purse I stopped weaving. Of course I also stopped because I ran out of warp 🙂
At this point I really wasn’t quite sure if this was going to look like the cute little purse that I had envisioned. I did the finishing wash and waited for it to dry to see if this was going to be a big enough piece to make the purse.

During this same time period I had been experimenting with dyeing some silk scarves. I went through some of my finished pieces and picked this one to use for the lining of the purse.

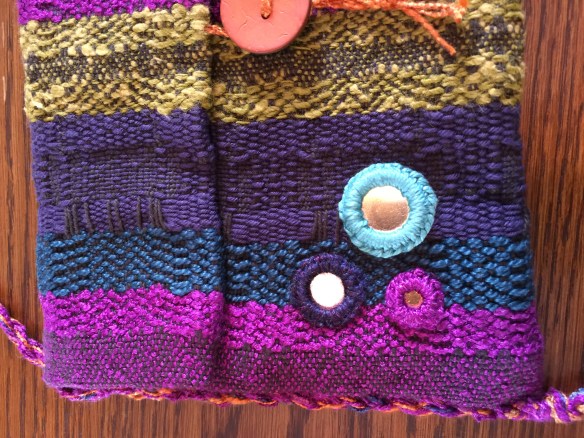
As I began the construction of the purse I decided it definitely needed some
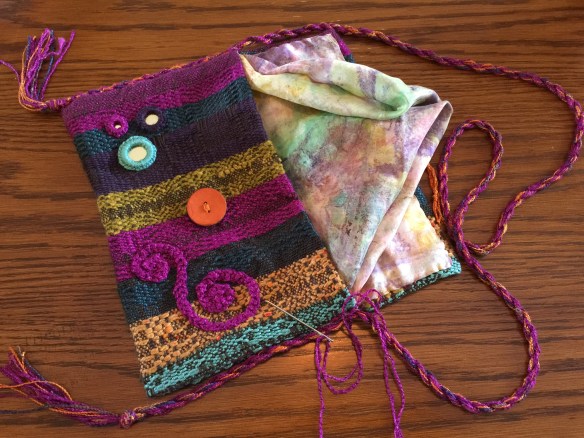
embellishments, so I added the mirrored and hand buttonhole stitched circles and the scroll that I had made by crocheting together multiple threads. I added a button and closure threads that had been braided and sewn into the flap.
I twisted a bunch of the leftover weaving threads together, putting a knot at each end to make a tassel, and hand sewed it onto the purse for the strap.
Before sewing the lining into the purse I stamped it with this friendship saying and the music notes on each side. I heat set the printing to make sure it was permanent.
My experiment was now complete and I was anxious to wrap it up pretty and give to my friend.
I was so glad to have something to give to her that I had handmade to brighten her day. She is still very much in my daily thoughts and prayers. Even though we now live many miles apart we still keep in contact and are still a part of each others lives.
I hope this article inspires you to make something beautiful, and treasure your friendships!
Until next time……..
….I Wish You Peace.


****


***
Until next time…..
…..I wish you Peace.
Last post I gave a hint about the next project I was starting to work on and the following is an update on how that project is going. I started out with this gorgeous hand dyed warp thread I got from Robinjedmundson on Etsy.
 I decided it would be cool to make a purse using this colorful rayon warp by combining it with a cotton weft. For the weft I used a mercerized cotton flake yarn. I felt that this combination of fibers would give the cloth enough body to make a purse.
I warped up the loom with a combined twill pattern using a 15 dent reed. The loom was warped with 130 threads (this included the 2 float threads).
 Because I had already done this pattern once with the same number of warp threads for another project …

I wove using a mercerized cotton flake yarn in a dark teal color for the weft.

I really love the play of colors in this dyed warp combined with the dark teal weft.

Here is a close up picture of the interplay of colors in the pattern.

The Weaving progressed very nicely, and the fibers were a joy to work with.

The colors did not show up very well in this picture but this is the piece as it was being taken off the loom.

And this is the piece laid out before finishing.

Once I did the finishing wash, dry and cutting off of the spliced in weaving tails, the finished cloth measured about 7 inches wide, and 64 inches long. I cut the fringe on one end 4 inches long and at the other end I cut it 9 inches long.
The end of the cloth that has the shorter fringe will be the top flap of the purse, and the longer fringe will be at the bottom of the purse.
I decided to add some copper and beading embellishments to the shorter fringe that will be on the top front flap of the purse.

First I strung some beads and added them.
 Then I flattened some pennies and textured one,

domed another and added more copper accents by twisting some copper wires and flattening them.
I am also considering adding these items……

Using this purple perle cotton, I thought I would add these beads by sewing the thread in and out of the fabric so that it shows through on top while tacking down the beads at the same time. I also though I would use some of these purple beads (right side of the picture) to add a few more strands of purple accents in 2 or 3 other places along the fringe.

I feel the purse is progressing nicely and I have several ideas already on how I want to piece it together. I don’t have very much of the warp thread left, but there is enough to add some into the inkle band that I am going to weave for the purse strap.
….So for now, it’s back to the loom….
Thanks for dropping in, hope this project inspires you to make something beautiful today!!
Until next time…..

….I wish you Peace

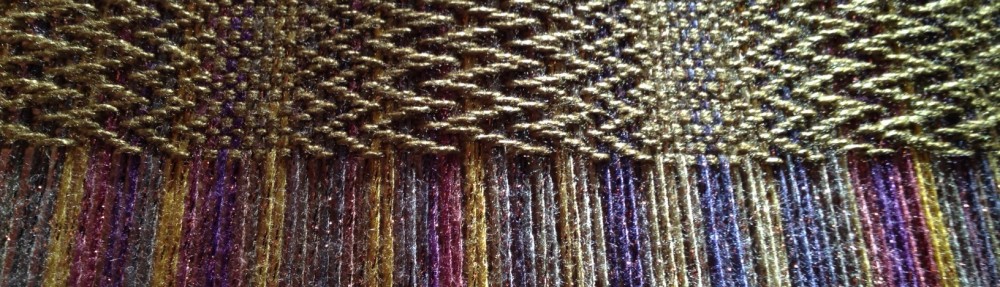
Do you remember that beautiful shimmering warp I posted about last week? Well, it just turned into an even more beautiful shimmering scarf !! This is the finished scarf.
I thought you might like to see some pictures of the scarf being woven so here are a few.

After I added the warp to the loom then the weaving process began….

…and the twill pattern began to show through the woven threads.

This picture shows the texture of the twill weaving.

I love how this zig zagging textured twill pattern looks intermixed with the bands of plain weave.
Time to cut the woven scarf off the loom and start the finishing process.

I wove the scarf about 98 inches long but as expected it did shrink a little in the finishing wash. But before I washed it I tied the fringe at each end of the scarf.

This is how the scarf looked after it was washed, air dried, then fluffed in the dryer.
It has a very fluid and silky drape.

I love how my shimmering scarf turned out!
Here is a sneak peek at my next project going on the loom. I will be using these beautiful hand dyed skeins of rayon yarn to make another twill patterned scarf.

I purchased this beautiful yarn on Etsy from the vendor – robinjedmundson.etsy.com

Guess it’s time to get back to the loom and warp up another project !
Until next time….
…..I wish you Peace
Nature photography in the Great North
Falling down the slippery fibre slope
Life on the farm and at the loom.
"been in trouble ever since I set my suitcase down..."
weaving, spinning and other fiber arts
weaving and spinning my way through life
Andrew's, Bethany's, and Cat's (ABC) 365 Project. We completed it in 2010 and now want to reintroduce the focus it brought to us.
Follow me as I weave along the way


 I just tied the new warp onto the old warp and pulled the threads through the reed and through the heddles instead of having to thread all of them from scratch.


